So sorry for the late reply!
I havent done anything over there since December.
As I understood what Kristi wrote, she is now taking the whole vanity & counter out, now that she knows the height after building the vanity & butcher block for that reason (to establish height), to put in wainscoting that will also act as backsplash. The best way to do that is to make an enlarged hole around the screw where it passes through the cabinet. Im curious if you had any issues with expansion and contraction due to changes in humidity. Once you have your angle set up a piece of wood and clamps for your straight edge.
 I have seen other people do similar sink cut outs and they used a large drill bit, or a small hole boring bit for the corners, which might make them easier (a little less hand work, maybe). As you guys may remember this entire kitchen renovation started by replacing a half sized dishwasher. I hope youll join me on my DIY and decorating journey! So I had to use a much larger blade that would not go around corners no matter what I tried. The actual dimensions of a 2 x 3 board are more like 1.5 x 2.5. You do not want a screw thats too long. Tom Silva shows how to install baseboard trim that become visual anchors for any room.
I have no idea if its food safe, but Im sure theres info on their website. I paint & refinish furniture for a living and have had varied success.
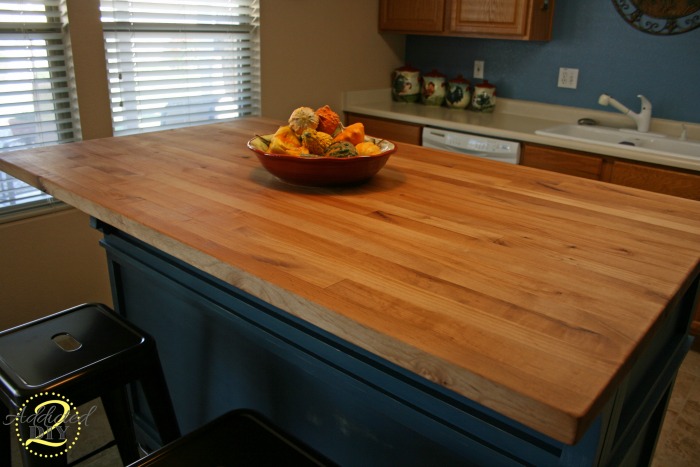
The natural color and grain of wood adds warmth to your kitchen decor.
When I researched it the only food safe coating was watco finish and bees wax i think.
It didnt look any better than yours, and I would hate to tell you what it cost! Not yet, at least. So what to do if you want more warmth in the heart of the home? Please tell me what brand of wood filler you choose to use for this countertop. Learn how your comment data is processed. (Make sure the screw is shorter than the counter is thick.). I started with the top board in the picture above, and worked my way down.
Excellent idea. I removed the old formica tops and slid the new ones in place.
Yes! Excited..cant wait! Tip: If oil buildup occurs, use a putty knife to lightly scrape away the excess, and reapply a thin coat. A great product for finishing butcher block counter tops is Waterlox tung oil. Did you consider the rental idea? Matt has M.S. That looks simply gorgeous. I do this when crosscutting oak plywood and preapplied formica counter tops as well. countertops wood countertop butcher block diy kitchen wooden reclaimed cozy keeping andrea counter remodelaholic worktop ikea trendy oak gray recommend
 butcher block countertop build counter diy island 2x4 2486 edited1 addicted2diy tops own kitchen luxury countertops counters 4x6 idea table Now instead of just using a tape measurer we put the counters in place to mark our cuts. I was advised to use a 2 part lacquer intended for wooden floorprotection but even this would not be heat proof.G. Advice.
Make sure your counters are in place and then take your remaining screws and screw the counter tops in place. bar tigerwood raised grain edge project previous Sleek granite and sharp stainless.
And you can click here to see the bathroom after its colorful makeover. I started this step by applying two coats of Waterlox Original, with 24 hours of drying in between. Im sure it will stain up and become a Bathroom with the WOW factor. 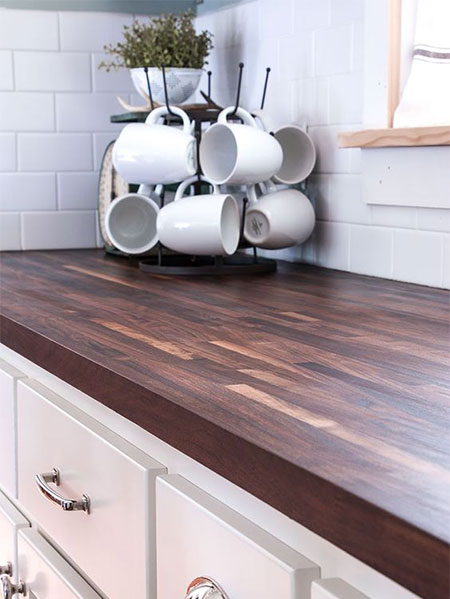 See my brother installed these counters a few years ago in his kitchen and really was the expert. Copyright 2022 This Old House Ventures, LLC. Using frogtape mark where to cut.
What did you use to seal the countertop? Drill the pocket holes in the next board using the marks I made as a guide for pocket hole placement. What a mountain of work, and what rewards you will reap!
But I will say that its an incredibly easy tool to use, and every DIYer should have one! butcher block install countertop center kitchen counter I know. , So here are some questions I know you probably have.
Beautiful work! For example, all my baseboards were cut that way.
But heres how the whole countertop looked at this point. I also sanded all of the edges by hand to give them that slightly rounded look that I like. We just don't put food directly on them. Copyright 2007-2022 - Kristi Linauer, LLC. Can you show a close up view of how you attached what I assume is a shop vac to your sander? But you must also screw it down securely while still accounting for the natural expansion and contraction of the wood. Wow! Before moving to the finishing stages, I used my circular saw to cut the countertop for the vanity to the exact length that I needed. Waterlox Original Tung oil finisheshave good heat resistance, can be used around stoves and are unaffected by boiling water and liquids. Use it to adjust the strip of cardboard so it overhangs the cabinets by the correct amount while pushed against the side wall. Not very pretty. 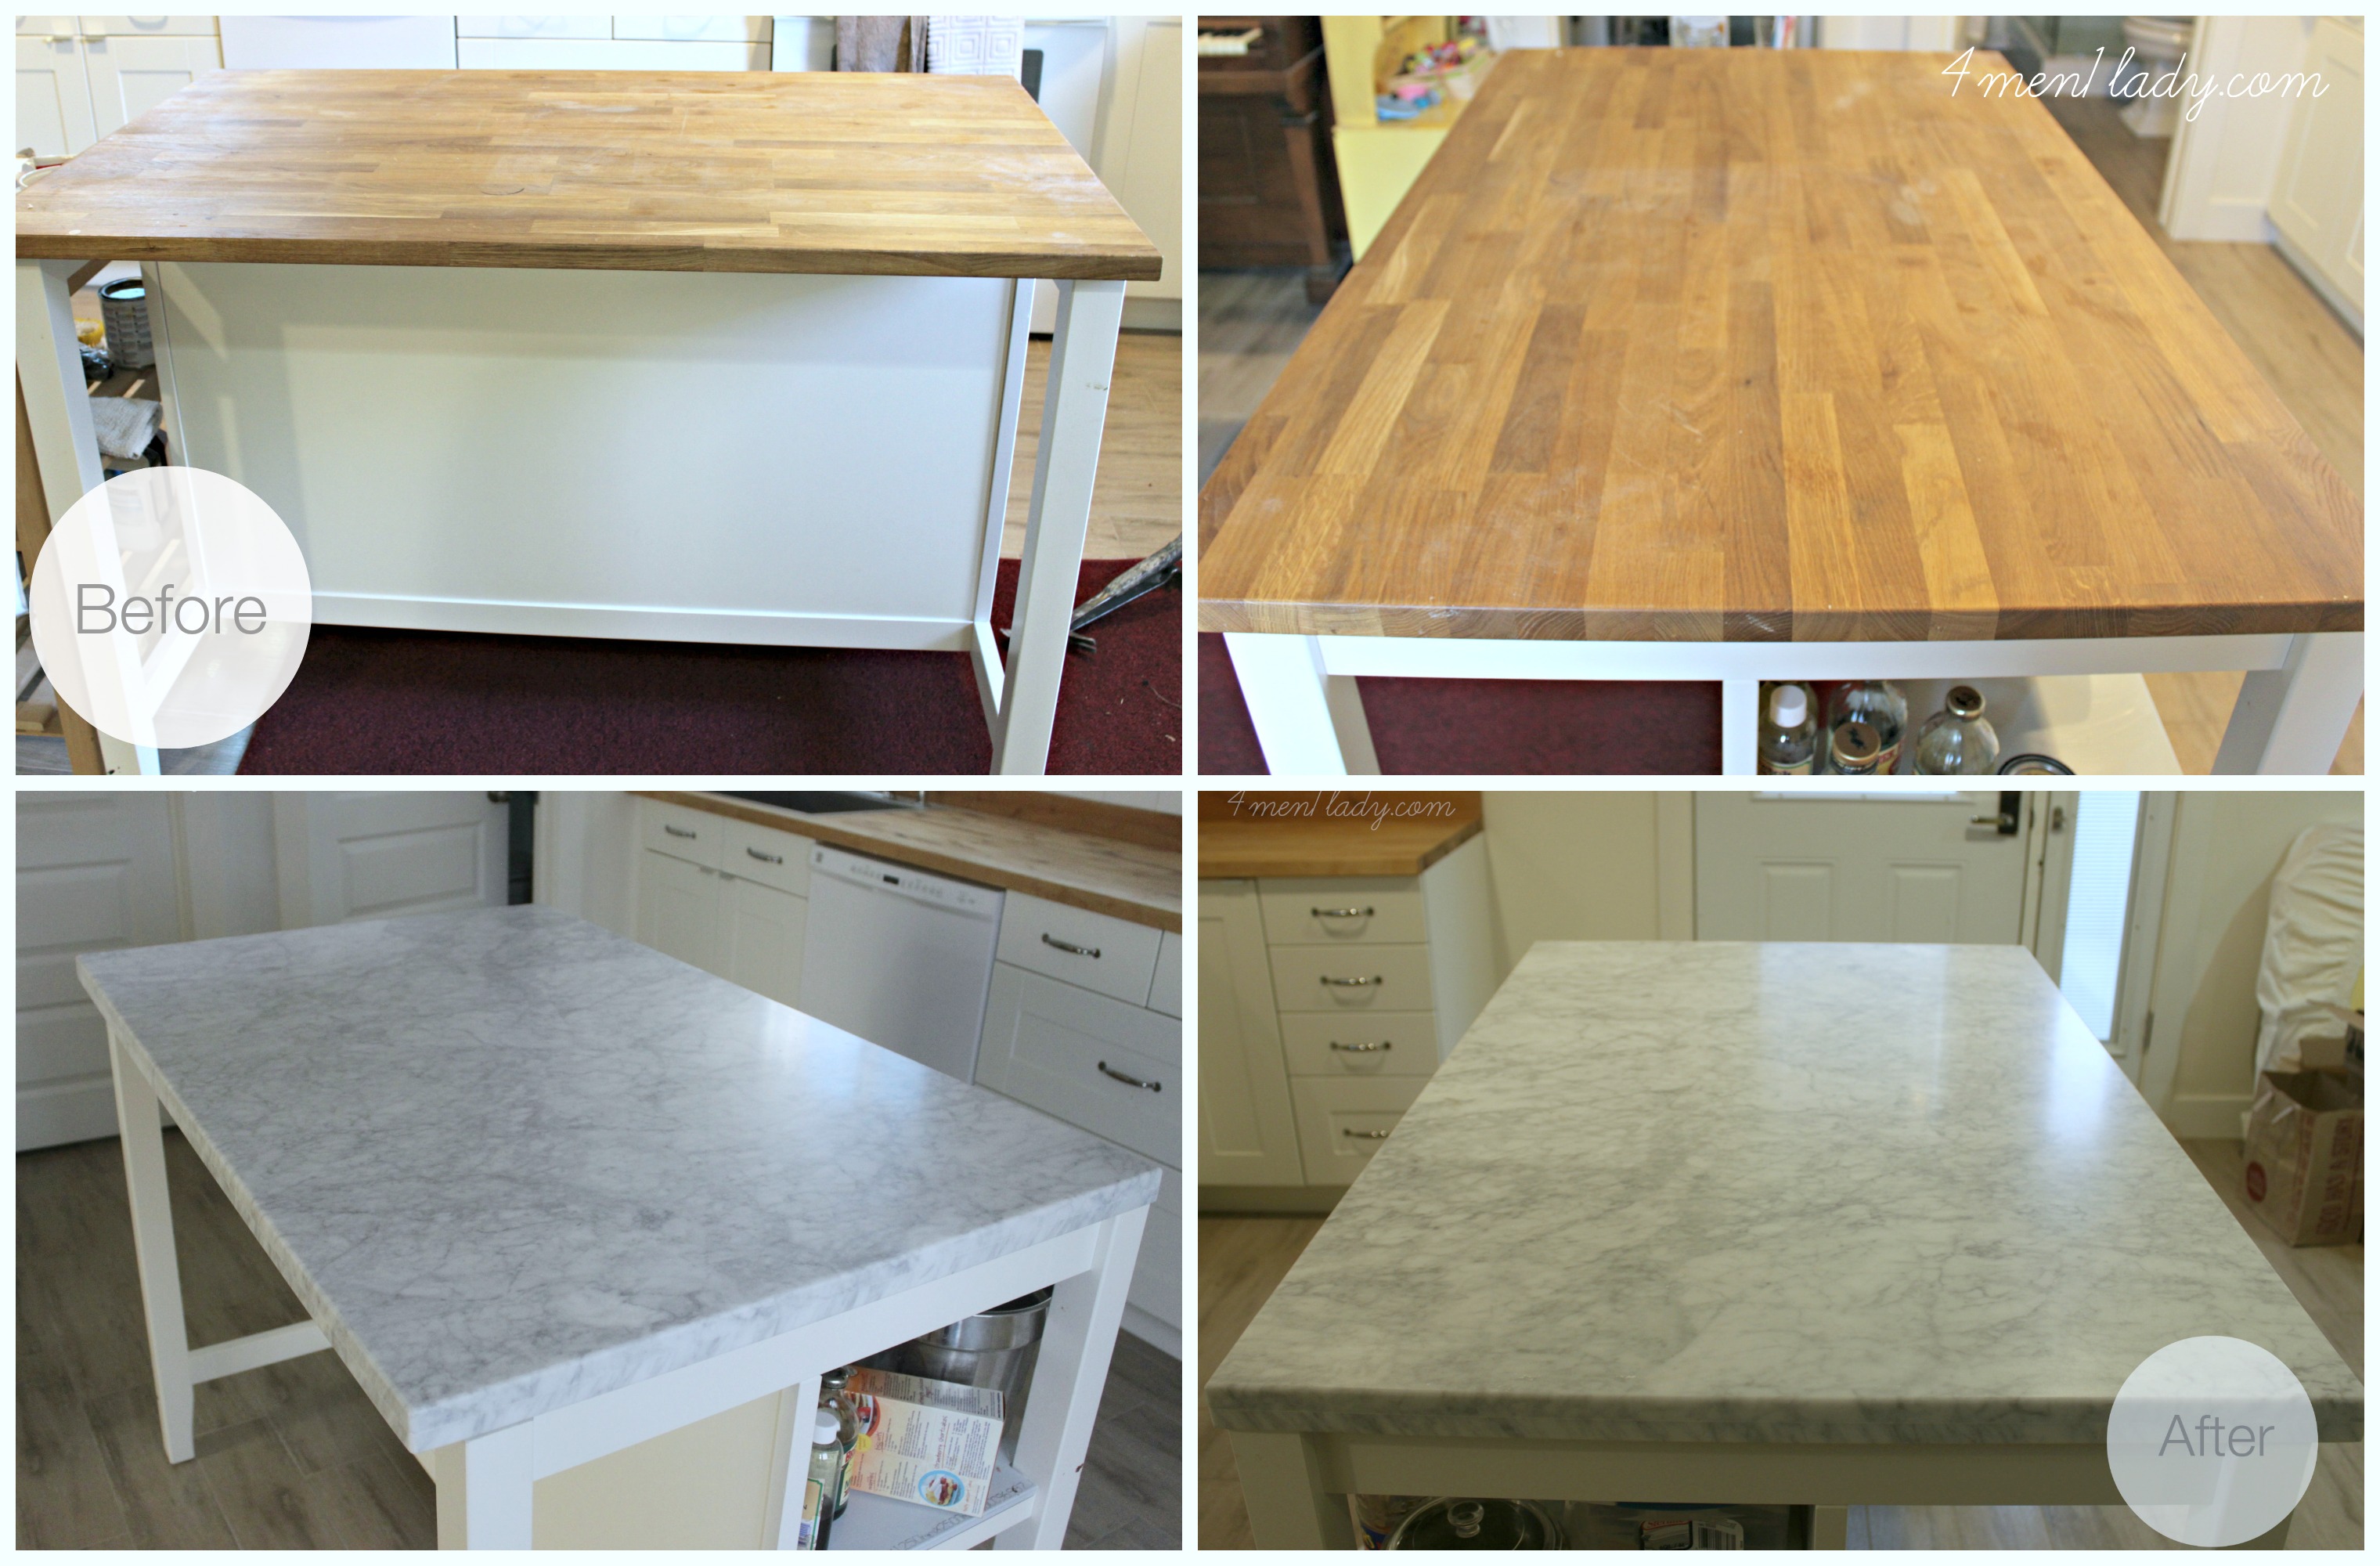 Ending up with a nice straight cut that will fit right under the sink farmhouse sink. We'd been wanting to add a backsplash so I added the tile backsplash before finishing with caulking the seams. Share it with us! The color choice also goes very well with the entire ensemble, so great job!
 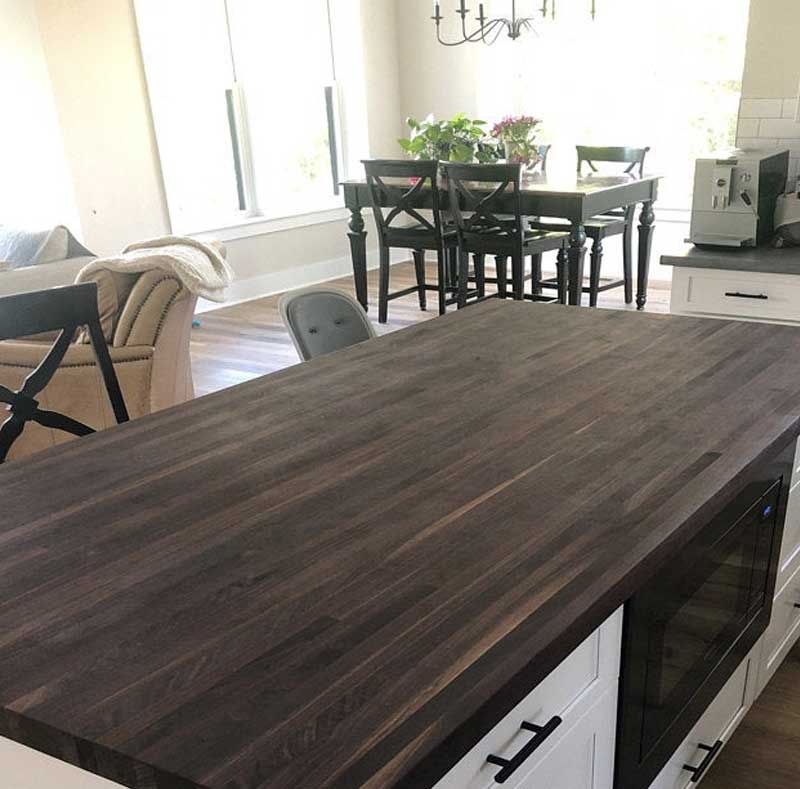 Fairly easy, but does require precise measuring. Now youre going to keep us in suspense!?!?!!??
Want to see how this bathroom turned out? Hi Kristi, Countertopswith a top layer of wood have all the qualities of solid wood, enhanced by modern technology.
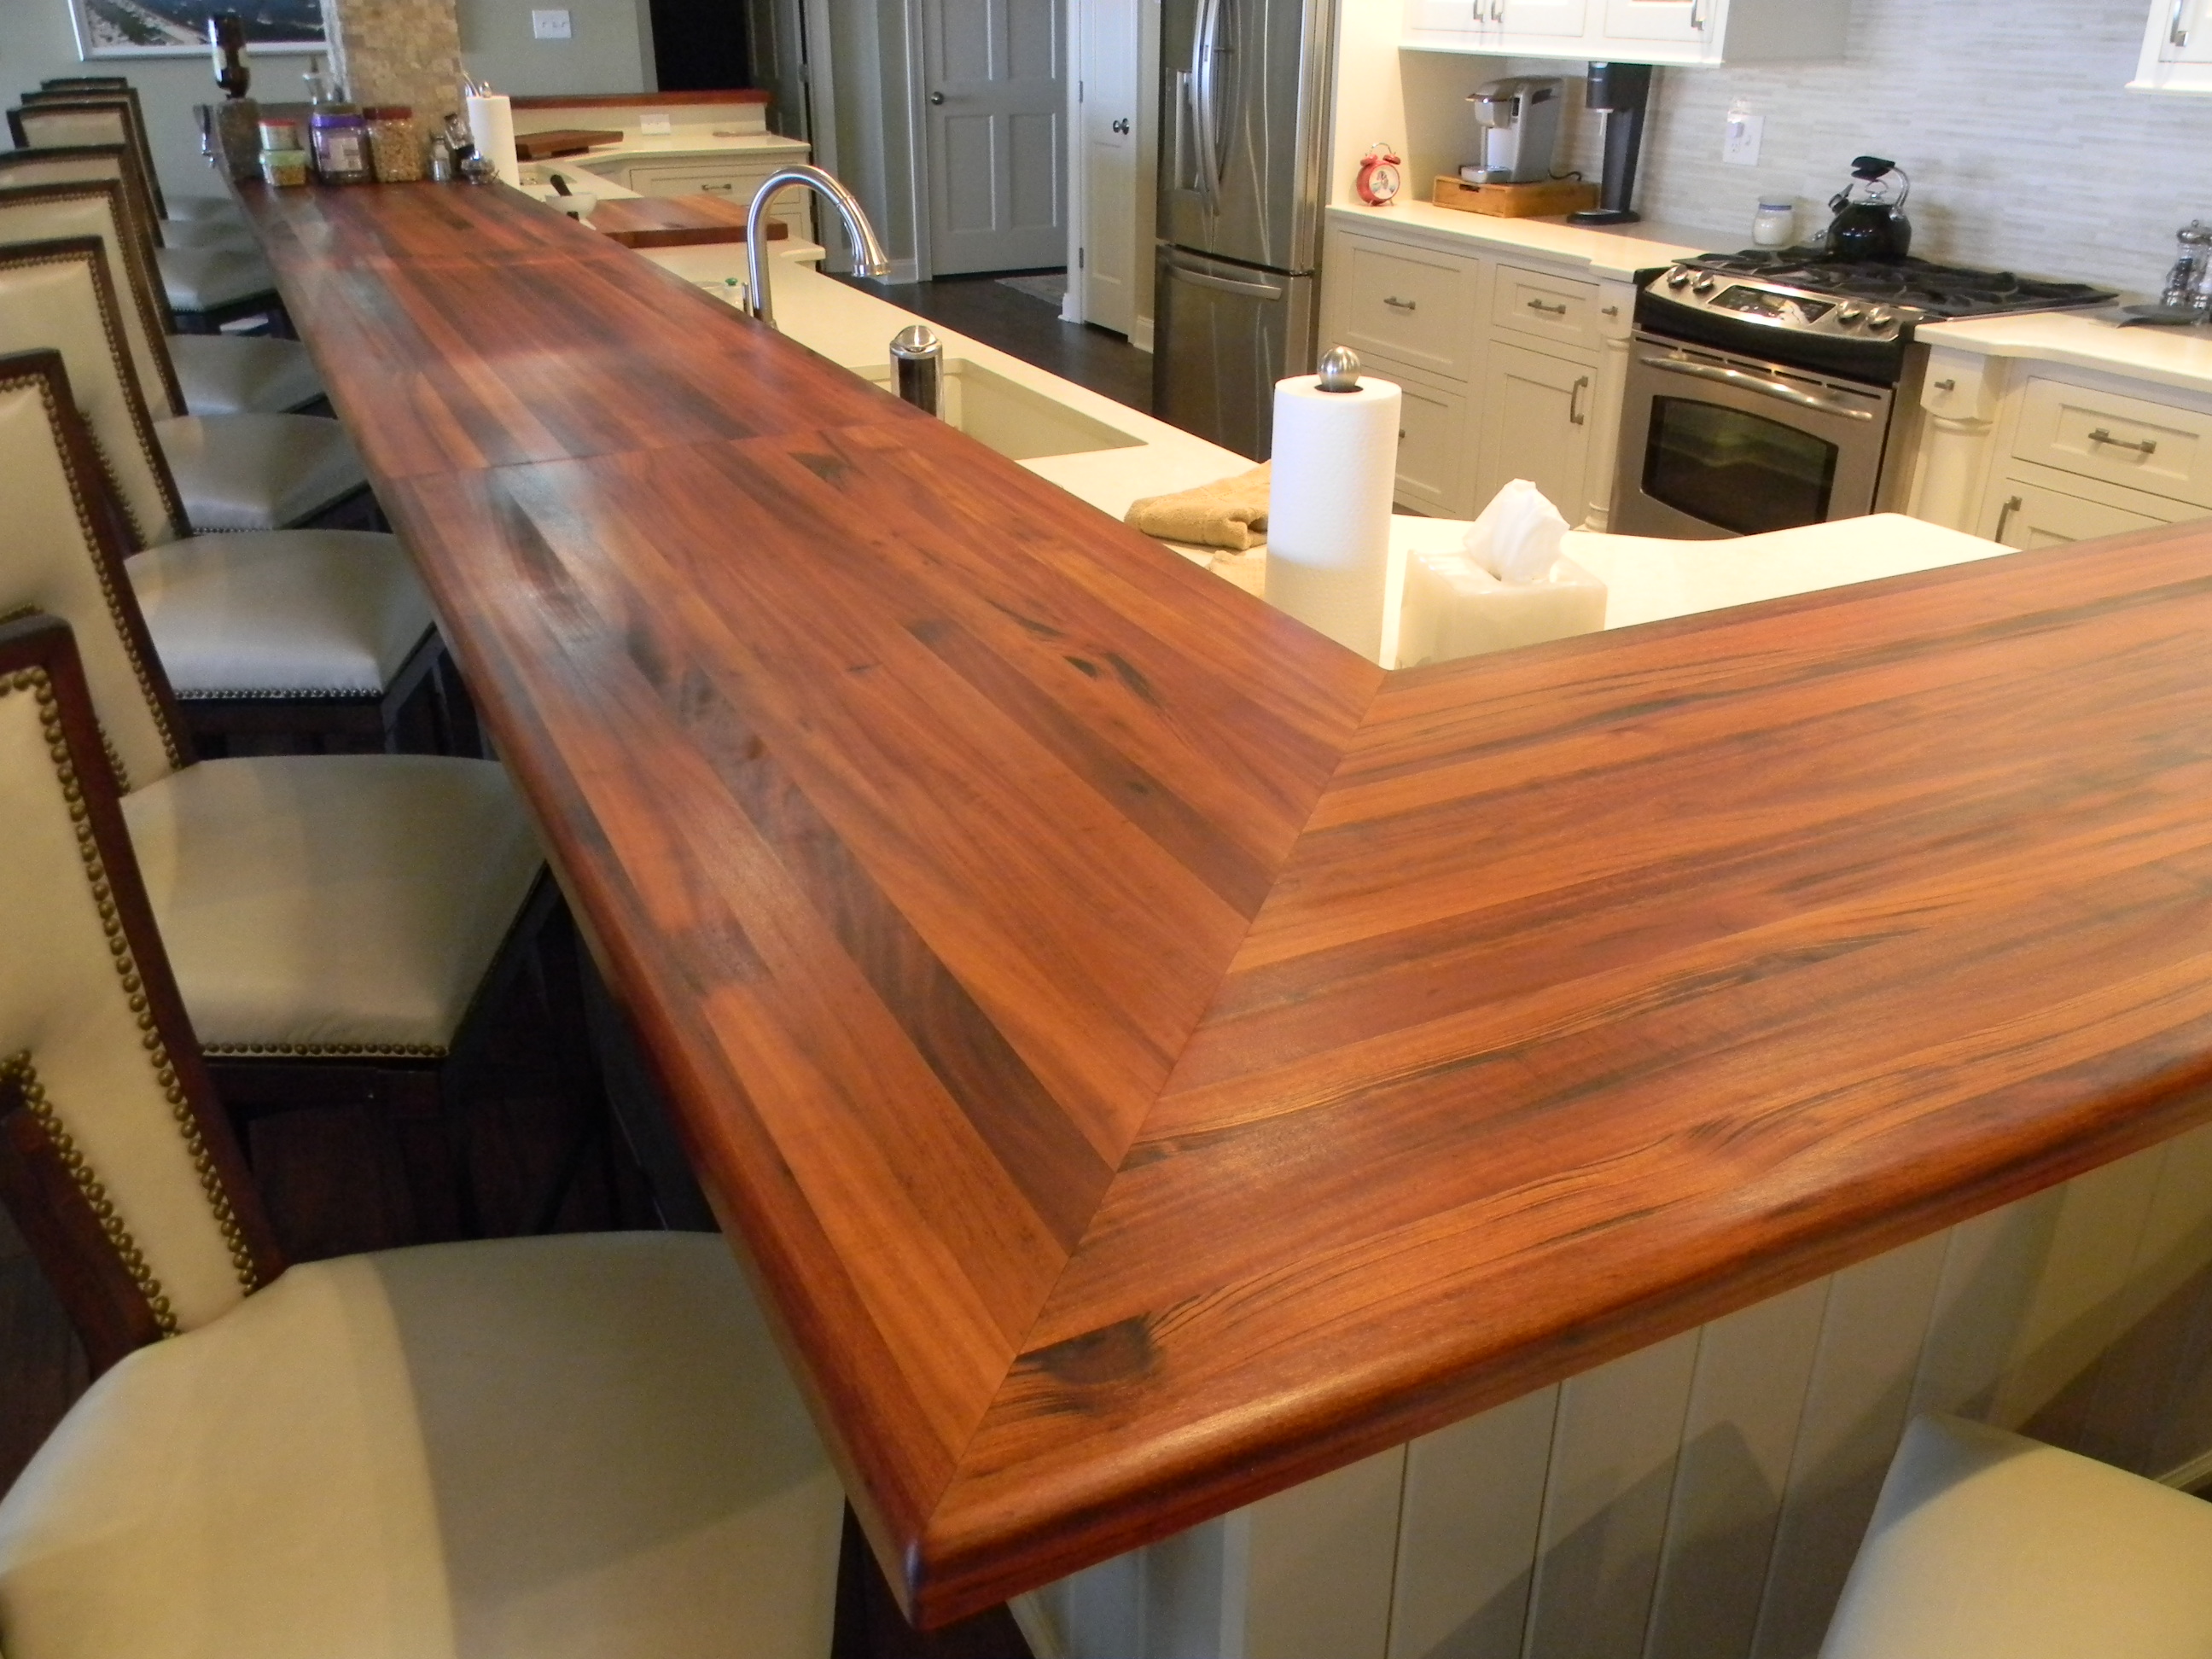
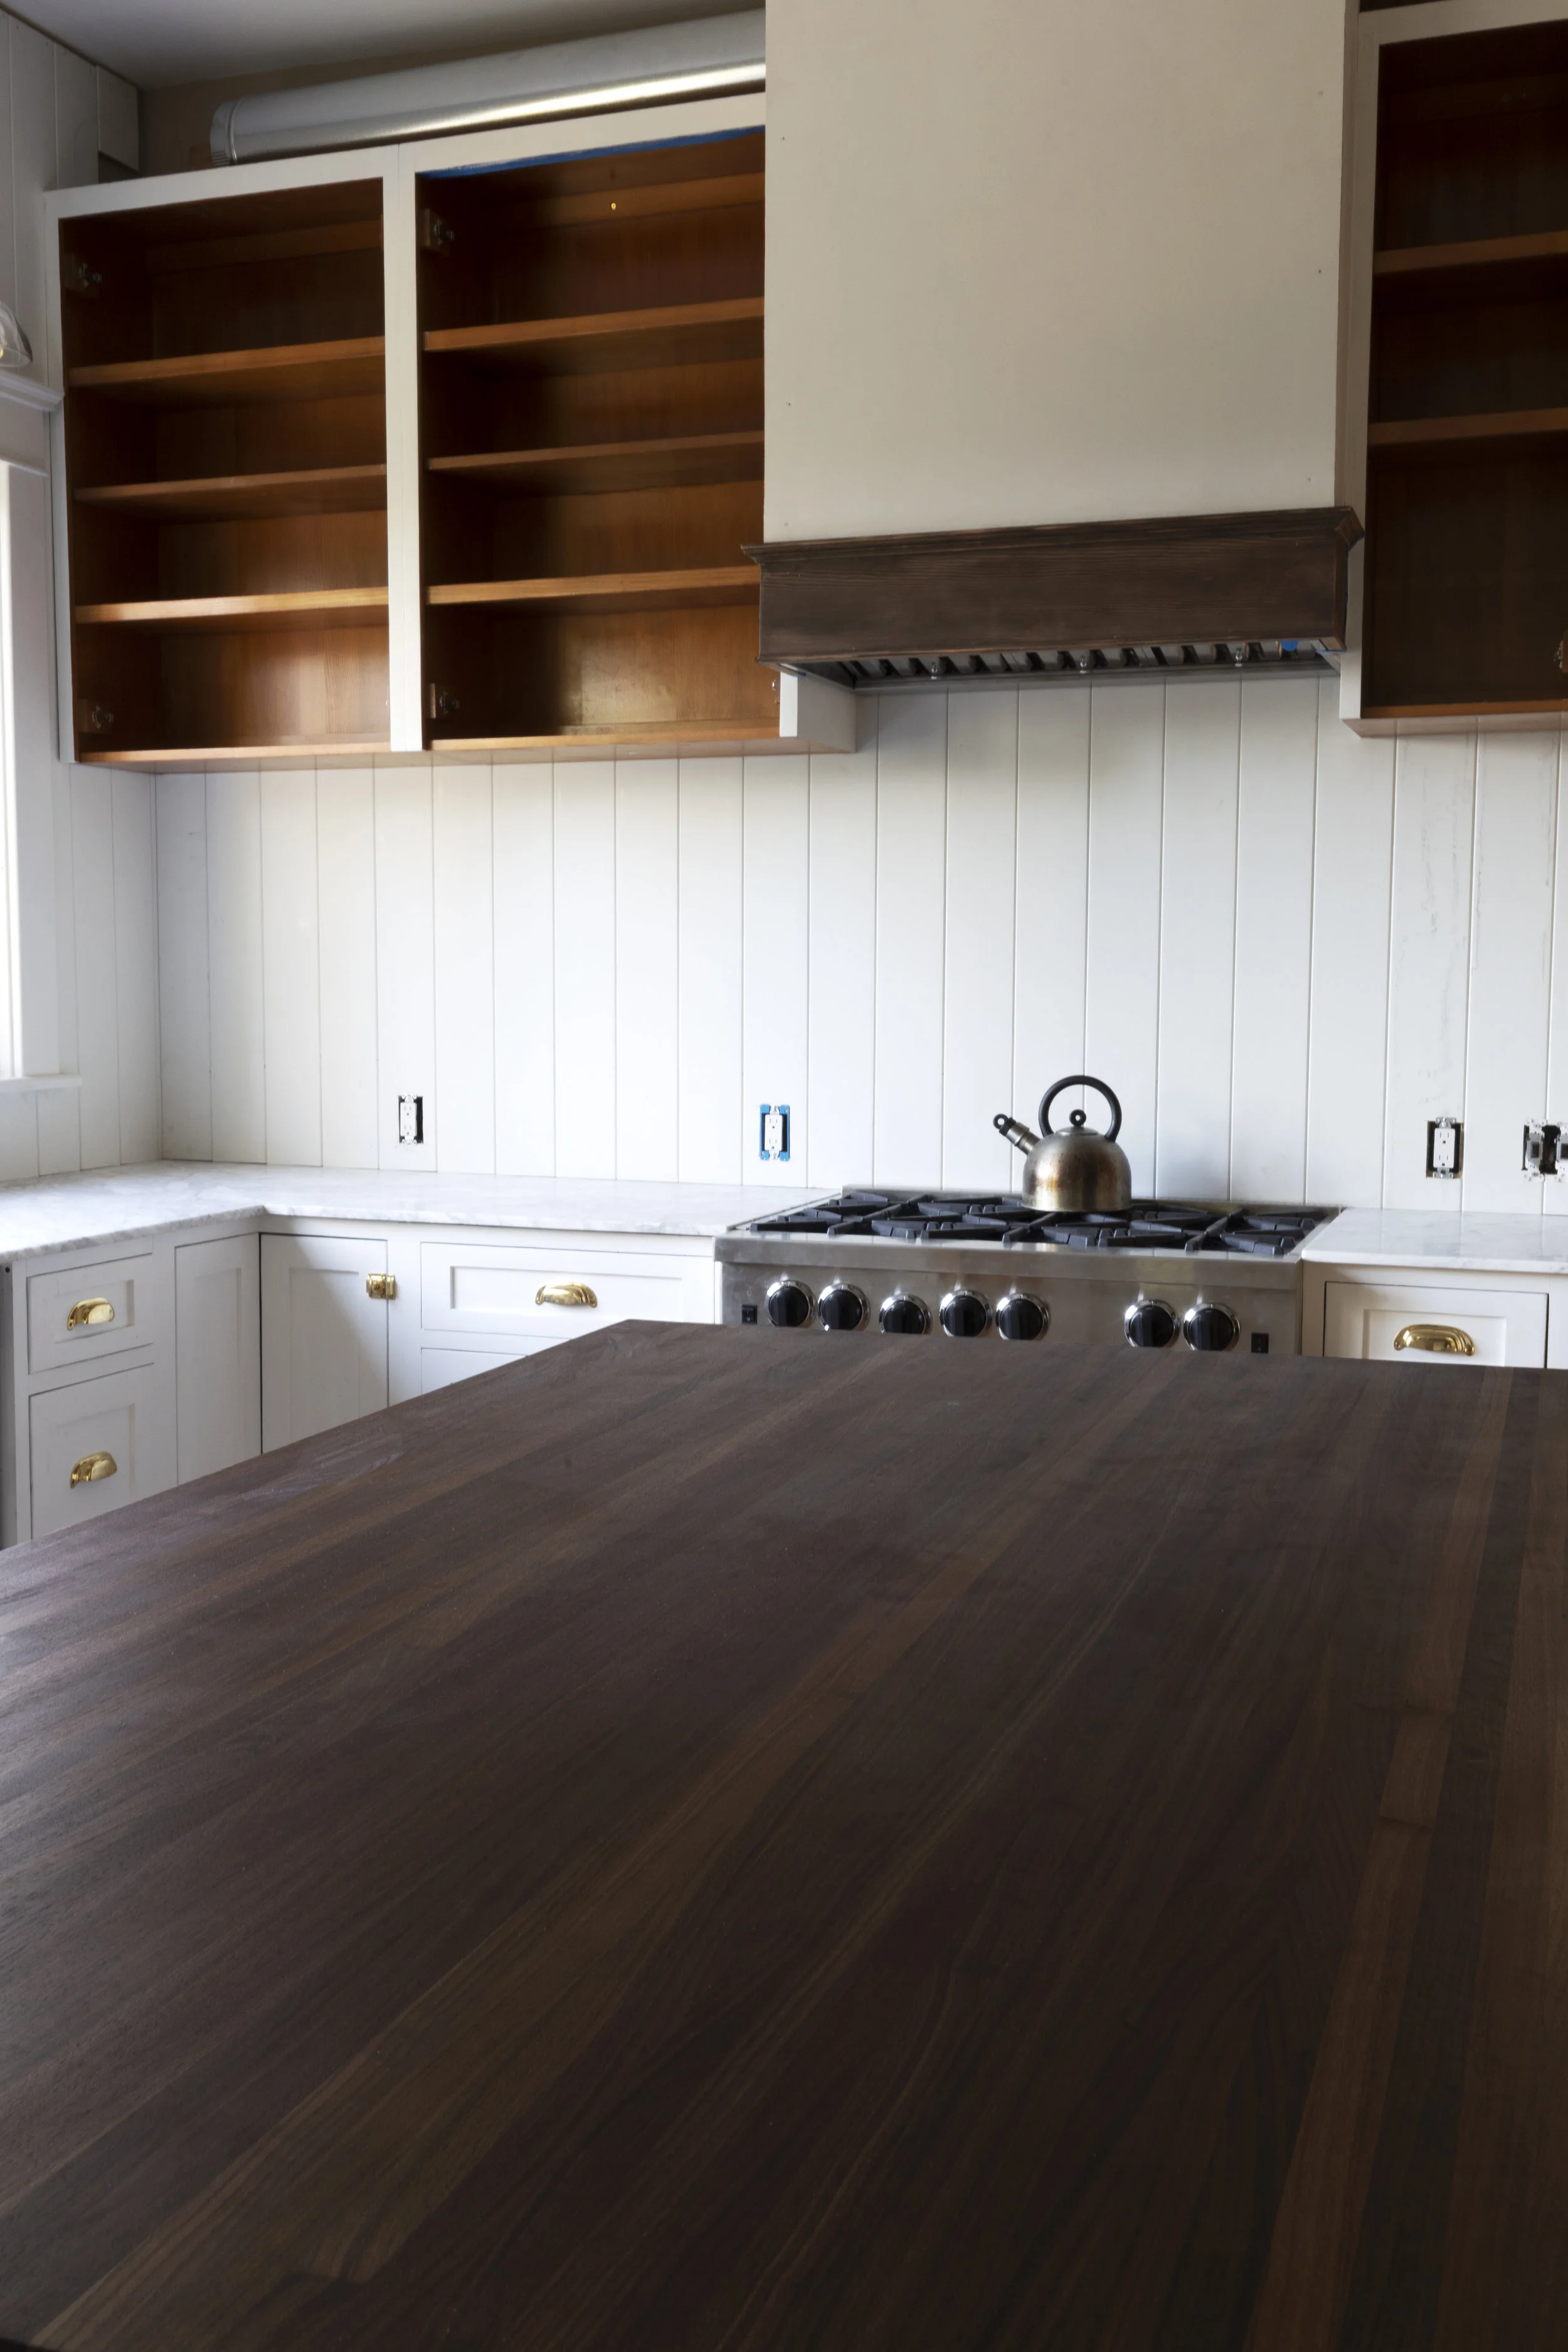
But if youre wanting butcherblock for your kitchen countertop (i.e., the busiest and hardest wearing room of the house), youd probably want a much harder wood like oak, or a much higher quality wood like walnut, and you might even want fancy edges like an ogee edge.
Put the countertop in place and repeat for the remaining side of the counters. But they had hard water, and any water left to evaporate on the counter left a white mark. But because of the way part of it will wrap around and act as a backsplash for the vanity, the wainscoting has to be installed before I can install the vanity. I also changed out my standard circular saw blade for a fine toothed blade for a super nice, clean cut.
I don't believe Waterlox is food safe, but I'm not positive. This is so awesome! Now if your counters are in good shape and you just want to update,see if you have a local Habitat for Humanity Restore in the area. Alternating sides start to screw in your pocket holes. Such an improvement! You give so much hope to those of us on a budget! Will you use some kind of wood conditioner to insure the stain will soak in evenly? The stain took beautifully and the pieces looks amazing. Im not going to go over the details of how to use a Kreg Jig since there are approximately 12,000 tutorials on YouTube alone.
Ive said it many times before, but Im very generous with my wood filler usage. Adding crown molding to your kitchen cabinets. Waterlox Original Tung oil finishes are water resistant, stand up to household spills and are non-toxic1 and food-safe when dry. Your finish looks excellent but I would be interested to hear how the finish is holding up to every daykitchen use. It has a rich variation in color and a decorative, curved grain pattern.
I love it when that happens!). Butcher block is typically made from hard woods such as maple or cherry. Again using frogtape we marked the indent that needed to be cut out and followed along those lines cutting with the jigsaw. Before bringing in your new counters take your old counters out. We can have beautiful and functional homes on a budget! Are you getting water damage to your countertops? Unfortunately, because of the thickness of the countertop, I wasnt able to use my fine blade thats made for cutting curves because its not long enough to cut through wood this thick. A blemished surface that shows signs of use may be just what people are looking for, if not, they wont get the results they are hoping for from simple pine construction lumber.
My guide was a crappy Pittsburgh from Harbor Freight. What brand wood filler do you use? I have to hold the shop vac hose onto the sander a I use it. Butcher block countertops offer you the natural color and grain of wood, adding warmth to your kitchen.
I plan on using it myself for some long counter tops in my study.
Today lets talk how to install Ikea butcher block countertops. It wiped off, but it was an issue. I hope this inspires you and I'd love to see pics of your countertops if you decide to make your own! I measured about four or five times to be sure I the placement just right, and used the template that came with my sink to mark the cut line.
If you have beginner to intermediate building/woodworking skills, and have some basic tools, you should be able to build your own butcher block countertops.
And then I would repeat that process to add the next board, and then the next, and the next, until all of the boards were attached together.  I found this site by accident a happy accident. Lastly, all of this, plus (not to speak for her), because shes made this as a furniture piece vanity, it can be floated in the room and theres no need for it to be completely flush to the wall, because its not a fitted piece.
But so far, this is what it looks like.
Then I drilled my pocket holes in board #3, and screwed it to board #2. video for S20 E37: Deck Chairs, Damp Basement. To protect these countertops (especially against water and moisture), I chose to seal them with several applications of Waterlox.
Using a utility knife, cut the cardboard along the scribe line.
We are back at it here with the kitchen renovation and finally my ugly black formica countertops are sitting in a dump somewhere and no longer haunting me! To prevent tearout on the top, run your circular saw along the bottom of the piece, so the teeth are pulling into the finish surface. It looks all luxe and modernand maybe just a little bit, you know, cold.  Before I did any more sanding, I cut out the hole for the sink.
senses. From identification to implementation, Play Projects is the ideal partner to plan, manage and/or execute your projects. Yes, it's a messy job. 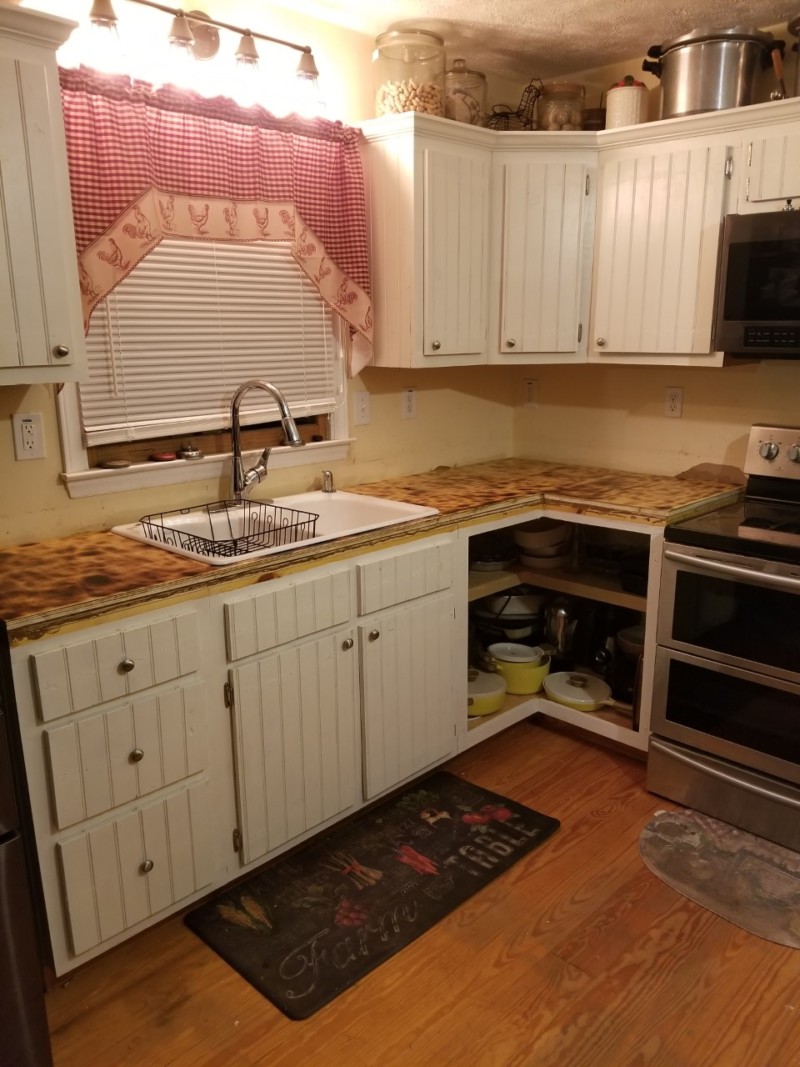 This increases the stability and makes them less likely to split or crack. Cut a longer strip to fit along the back wall, and scribe it if necessary. Cant wait to see this stained! Im looking forward to seeing the finished vanity! It didnt need to be perfect since I would be doing lots of sanding, but I didnt want to end up with any really significant height differences from board to board because that would just require even more sanding. Thanks for the links to the Kreig saw stuff, going to take a look at it since I would like to rip my leaves for my dining room table and make an uneven board on board farm table out of them. You should still just let us know, then we can see how ridiculous they raise their prices.. First of all, great job on the counter top, this is a great low budget solution. Make sure the two short ends of the strip are straight and parallel to each other. Then I was finally ready for wood filler. The countertops look portable at the very first glance which really intrigued my interests. And of course, the boards had those ugly stamps on them. Before screwing these in make sure that the 2 1/2 screws will work for your project. I love when your posts show up in my email, you always impress and inspire me! Thanks for making these instructions.
Thank you for this great tutorial! Wow, the countertop looks really nice. I create how-to videos about the projects I love and make.
butcher block countertop seal Many manufacturers will measure and install a butcher block for you, but you can save on labor by making your own template out of a semirigid material, such as cardboard, and sending it to the factory. This time, I took more care to draw a very straight and neat line. I thought I had decided on lacquer, but a few people have warned me against it. butcher block countertop sand cut finish install grit polish diy Nicely done!
Hopefully youll be showing us the results soon!!!!
Will be attempting to follow your steps this weekend! I wanted to make a butcher block table, and I was intrigued with your process of using pocket screws instead of bar clamps. kitchen countertop wood block butcher designs island reclaimed charming idea In this review, the This Old House Reviews Team researched the five best solar generators on Amazon to help you find the product thats right for you and your home.
I didnt have to fill any cracks or anything like that when I refinished it last month. I chose not to use my belt sander simply because its a very powerful tool, and it takes a lot of strength to keep it under control. Warm up the look of your kitchen with this easy-to-install surfacing. And it doesnt always turn out how I thought it would. Thanks for sharing. It often has knots or heartwood in cream or light brown which will give your countertop a unique and distinct natural look.
Ive never seen an undermount sink used in a bathroom, so I am excited to see the finish product. It doesnt stay attached on its own.
Were the materials food grade? But when the dust (and fiberglass) settles, you'll enjoy a fatter bank account and more comfortable indoor temps year-round. Allow the oil to soak into the wood for a few minutes, then wipe off the excess.
You have to work the steps that work for you. Tip: For larger countertops with sinks or ranges, tape down strips to outline where the rough openings for the necessary cutouts should go. If youre satisfied with a less expensive wood like pine, and the countertop will be used in an area like a utility room or bathroom, and you already have all of the necessary tools, it will probably save you money to build your own. I wanted a slightly lighter finish. On most cabinets, which have no tops, that means installing blocking to provide support. These woods are harder, as suggested by the classification, and will hold up better under more demanding uses (i.e. You can click here to see the finished room. In fact he is putting them in at my sisters house in a couple weeks.
It worked out great! Once you have made your pocket holes run clear silicone on the inner edge of your counters. Addicted 2 Decorating is where I share my DIY and decorating journey as I remodel and decorate the 1948 fixer upper that my husband, Matt, and I bought in 2013. We contemplated replacing the area around our sink, but ended up splurging for quartz. It can go through a doorway. For this bathroom project, Im building a 1/5-inch thick, durable butcher block countertop that could accommodate an undermount sink. They are pine, and they started out pretty rough. Using two spare pieces of wood and four clamps we created a straight edge for our circular saw.
Also note on the template which edges should be shaped in a profile and which will be straight cuts. Using the piece of cardboard and an exacto knife. Its turning out great, cant wait to see the bath completed, but love seeing every step along the way even more. Needless to say we really like our butcher block counters in our family.
From inside the cabinet, drive a deck screw fitted with a fender washer up through each hole, into the butcher block. The pink must've just been the lighting.  We decided to use a kreg jig to create pocket holes on the underside of the countertops.
  Those look great. You can learn more about me here. Oh, how I wish I had thought to cut off the rounded sides of the 24s that I made into a table top.I sanded down ALL those rounded edges by hand..lol. Using a handsaw, cut plywood or 1x scrap to fit tightly within the width of the cabinet.
  It still needs staining, lacquering, and sanding (I want a hand-rubbed finish), but itll get there. Did you refinish those yourself? Just order it to size, and then fasten it down. First, I made a flush mount glass bubble chandelier to go, Its not often that youll see colorless pictu, Just my bright, sun-filled living room after dark, Entry, living room, music room, kitchen, and sitti, this is the updated version of the set I have, You can click here to see the finished room, click here to read the details of how I finished the pine countertop the second time, click here to see the bathroom after its colorful makeover, Four Reasons Im Refinishing My Hardwood Floors First, For My Fellow Slobs, Pack Rats & Procrastinators, DIY: Turn Jars Into Snowy Winter Candleholders, My Stained "I Can't Believe It's Cheap Pine" DIY Butcherblock Countertop (Plus, Vanity Paint Color Options), https://www.addicted2decorating.com/how-to-refinish-pine-wood-countertops.html. Tape it in place between the two sides.
Walnut gets lighter in color with age. I do think these would work on older cabinets. Jig Saw Its color ranges from light brown to a rich reddishbrown and it darkenswith age. They work perfectly for making a template, if you have a corner that you need to cut at a 45 degree angle. Finished Ikea Hammarp Butcher Block Counters I made new countertops for my kitchen using a butcher block slab I bought from Ikea. Last Updated on March 26, 2022 by Kristi Linauer.
I staggered these marks, as you can see below.
Sorry to hear that turning 70 is slowing you down. waterfall wood butcher block countertops countertop island counter kitchen custom edge walnut bar counters tops marylandwoodcountertops blocks kitchens english cabinets First, it needs a sturdy surface on which to rest.
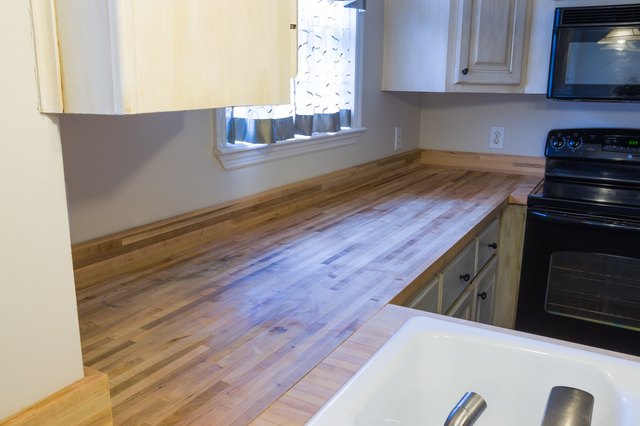
 I spent about 20 minutes giving it a preliminary sanding with 60-grit sandpaper, and it was already starting to look and feel much better. This was 30 years ago, and finishes have improved since then, Im sure. Hi Kristi, I think it looks great! I refinished the countertoep last month, not because the finish was damaged (it was actually in perfect condition), but because it was darker than I wanted it for the more colorful makeover I did last month. How to Finish Ikea Butcher Block Countertops. By the way 23 studs are typically used in spaces where structural support isnt required, like framing out a basement, and where space is limited. Thanks so much! On a naked wood surface you could just sand out any burns and I believe that wood is relatively antibacterial. To make sure I didn't cut too deep, I used painters tape to make a depth guide on my drill bit. I just refinished this countertop about a month ago. So we stained and sealed them in the end.
Will you add a backsplash at all? I'd love to see the finished counters when you are done! We brought up two saw horses from the basement and brought the first piece up. We placed the sink into position to get this measurement correctly. Youve done such a beautiful job!
There are some really helpful videos showing how to use a Kreg Jig. Secure it to the cabinet with 1-inch deck screws through the pilot holes. You can use whatever width you want.  I made sure to push it down into all of the cracks as much as I could, and I also used it to smooth out all of the knots.
 I just needed an idea of where to the sink would be so that I didnt put screws in or right up next to the sink hole. The problem with the boards is that theyre rounded on the edges. butcher plank pjh remodelaholic Goodness your home will feel like your baby by the time you are finished!
  Great description, thank you. Make a second strip in the same manner for the opposite side of the counter. Once all the pieces are taped in place, mark all the joints between strips with reference lines that run across the seam of the adjoining pieces. Its far superior to Minwax in every way imaginable, including how it works and looks on wood filler. My parents made a red cedar counter top in their home in Sedona, AZ. My marks at this point didnt have to be precise, as this sink outline wouldnt actually be the cut line I use to cut the sink hole. 3 years ago. Get the latest This Old House news, trusted tips, tricks, and DIY Smarts projects from our expertsstraight to your inbox. Curious about the kitchen cabinets, they looked pink in one picture. Looks great, why not use wider pine 2xs?
  Bora? We just dont let raw food touch the counter tops. The variations in the color make eachcountertop unique and give it a distinctive natural look. This helps to even out the color and create a much more even stain coat. Adjust a combination square to the depth of the counter overhang. This was a fairly easy and inexpensive remodel and a big upgrade from the old formica that came with the house. Absolutely! Kreg Pocket Hole Jig island kitchen butcher block diy before cool blogger That was interesting to read on how you achieved you top.
No water damage at all. Now I use Rust-Oleum wood stain exclusively. Next, I took some measurements on the vanity, marked where the center of the countertop would be, and then determined the position of the sink.
I got it put together, did a preliminary sanding with 60-grit sandpaper, cut out the sink hole, got all of the cracks filled with wood filler, and then sanded it down to a smooth finish with 150-grit sandpaper. Thanks so much. Frog Tape I wanted the countertops to have more of a matte finish, so I used a mixture of 50/50 Waterlox Original and Waterlox Satin Finish for the last two coats of sealing - for a total of 4 coats. If youre not used to using a belt sander, it can easily get out of control and cause damage.
Once I determined the order in which I wanted the boards, I flipped the boards over because I would be working on the bottom side of the countertop to put it together. Drilling two pocket holes on each side of the cut about 8-12 inches apart. How to Make a DIY Butcher Block Countertop. A solar generator gives you backup energy from the sun should your electricity fail. 2 1/2 Blue Kote Kreg Screws. That is looking beautiful! Of course, he had to use some filler trim to cover the gap between the cabinet & wall but it was better than having to sand down the door trim in order to open the drawer! Be sure and check out my YouTube channel for more builds.
I did give instructions for the new finish. Next, I used my Kreg pocket hole jig (this is the updated version of the set I have) to drill the pocket holes, and attach the boards to each other one by one. cutting, dropping a hairbrush onto it, general work surface activities).
The corner is the most intimidating part of the whole installation. Thanks so much! Your cabinets looking relatively newdo you think this would work on older cabinets? Summer Holidays for Chicken (using Poor Man's Fibreglass). And each time I clamped the boards, before I added the screws, I would stick my hand under the boards and feel to be sure that the boards were lining up flush with each other on the top side of the countertop.
Seems this would have been the perfect excuse to buy a router!
3 years later, how do these counter tops look now? I started out with 2 x 3 pine boards. In either scenario, you should affix the butcher block to the cabinets using a flexible kitchen and bath sealant. The tops needed more protection than the bottom. You did a wonderful job on those corners, I am impressed! FYI, the studs that you used are furring studs used for non structural walls, such as covering brick face. Plus the raw cabinets didnt have the drawers and doors flush to the edge. I dont know anything about carpentry but I can appreciate all the work you put into what youre doing.